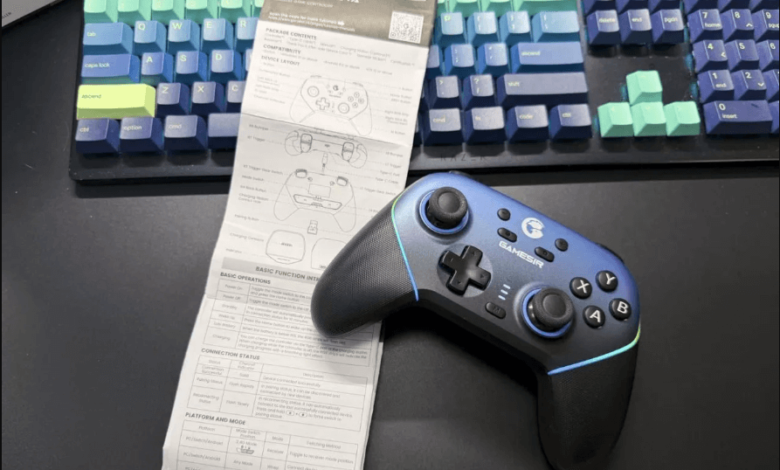
For decades, the mouse and keyboard have reigned supreme in the PC realm, offering unmatched speed and precision. However, for genres like action-RPGs, racing simulators, platformers, and fighting games, the comfort and fluid movement provided by a game controller are indispensable. Getting a new controller, whether it’s a standard Xbox pad, a PlayStation DualSense, or a premium device with back paddles, is only the first step. True PC gaming comfort and competitive advantage come from mapping and testing every button meticulously. This guide serves as the definitive PC controller setup roadmap, ensuring your new peripheral is customized for maximum comfort and, crucially, verified for flawless input using a reliable game tester pad.
I. Phase 1: Initial Setup and Custom Mapping for Comfort
The goal of the initial phase is to ensure your controller is correctly recognized by Windows or macOS and that the core controls are ergonomically tailored to your hands and preferred games.
A. Driver Installation and Basic Controller Detection
Upon first connection, the operating system (OS) needs to correctly identify your device.
- Xbox Controllers (XInput): These are natively supported by Windows and usually require no extra drivers. The system automatically detects and configures them via the widely used XInput standard.
- PlayStation/Switch Controllers (Non-Native): Devices like the DualShock or Switch Pro Controller may require third-party wrappers (such as DS4Windows) or the comprehensive configuration tools built into platforms like Steam. This ensures proper controller detection and interpretation of the signals.
- First Check: Before moving on, navigate to your system’s Game Controller settings to confirm basic recognition. If the device appears, you can proceed to the comfort stage.
B. Custom Mapping and Ergonomic Prioritization
Default button mapping is rarely ideal, especially if you have an advanced controller with extra inputs (paddles, function buttons). Custom mapping is the key to minimizing hand strain and maximizing reaction time.


- Prioritize High-Frequency Actions: Identify the buttons you press most often (e.g., jump, dodge, sprint). Map these to the most accessible buttons, such as the back paddles or the inner triggers.
- Utilize Steam Input: The Steam client offers a powerful configuration system allowing you to create custom profiles for nearly any game. Use the gamepad controller tester interface within Steam to visualize inputs as you map them. This lets you bind joystick directions to keyboard keys, create radial menus, or define action layers for complex controls.
- Adjusting Dead Zones (Temporary Fix): If you notice your thumbsticks feeling too sensitive, you can slightly increase the dead zone in the mapping software. However, remember this is a band-aid. We will use a dedicated tester in the next phase to diagnose and fix the root cause of any unwanted sensitivity or drift.
See also: English Sikho: Best Apps and Techniques to Improve Fluency
II. Phase 2: The Critical Test—Verifying Raw Input Integrity
A perfectly mapped button is useless if the hardware beneath it is faulty. The major failure points—stick drift, degraded trigger sensors, and sticky buttons—are often masked by the operating system’s error filters. To guarantee boss-level performance, you must verify the raw data stream using an external tool.
A. The Flaw of System Calibration
Windows and consoles apply large “dead zones” (areas of ignored input) to analog sticks to prevent small, noisy movements from causing screen jitter. This is a comfort feature but a diagnostic flaw. A stick that is secretly drifting (transmitting a constant value of 0.010) will pass the system check but will still handicap your precise aiming by delaying the effective input.
B. The Non-Negotiable Step: Using a Gamepad Tester
To see the controller’s true, unfiltered electronic output—the absolute zero point of the sticks, the smoothness of the triggers, and the immediate response of every button—you must rely on an independent web utility.
Actionable Advice: Before launching your next game, plug in your controller and use a free game tester pad online. This tool bypasses the OS filters and displays the exact numerical values being transmitted via the Gamepad API. This is the only way to accurately test game controller hardware and find hidden defects.
III. Phase 3: The Complete Hardware Testing Checklist
Use this checklist, referencing the real-time data on the gamepad controller tester, to certify your peripheral is ready for competitive play.
Test 1: Digital Input Consistency (Buttons and D-Pad)
Every button should activate and deactivate instantly, registering a perfect digital signal.
- Full Press Verification: Systematically press and release every face button (A/B/X/Y, Circle/Square/Triangle/X) and all shoulder buttons (L1/R1, L3/R3, etc.).
- Instant Release: Observe the button indicators on the tester. The indicator must activate immediately upon press and return to its off state instantly upon release. A delayed release often points to a worn or dirty internal rubber membrane.
- D-Pad Fidelity: Press the D-Pad in a full rotation. Ensure that only the intended direction registers. Simultaneous diagonal inputs or misregistered directions indicate significant D-Pad contamination or mechanical wear.
Test 2: Analog Stick Perfection (Stick Drift and Center Check)
This check is essential for ensuring maximum comfort and eliminating phantom movement.
- The Zero Test: Place the controller on a desk and rest the analog sticks completely still for 10 seconds. The X and Y axis values for both sticks must settle at exactly 0.000.
- Drift Identification: If the values hover or settle at anything greater than |0.005| (e.g., -0.015 or 0.008), the stick has confirmed drift. This means your thumb is constantly fighting a phantom input, requiring you to increase the in-game dead zone and sacrifice aiming precision.
Test 3: Full Axis and Trigger Range
A restricted range means you are losing character speed or input proportionality.
- Maximum Range Verification: Push both analog sticks to their absolute maximum edge in all four cardinal directions. The tester must register 1.000 (or -1.000) for the corresponding axis. Failure to reach this value (e.g., stopping at 0.98) indicates physical debris or wear restricting the stick’s full travel, thus reducing your character’s movement speed.
- Analog Trigger Smoothness: Slowly depress both analog triggers (L2/R2) from rest to full press. The numerical value must increase smoothly and linearly from 0.000 to 1.000. Jumpy input (sudden leaps in value) or failure to reach 1.000 indicates a bad potentiometer in the trigger itself, which is critical for racing games or proportional aiming.
IV. Long-Term Maintenance for Sustained Comfort
A perfect PC controller setup requires ongoing care to maintain its comfort and precision.
A. Environment and Storage
The number one enemy of controller lifespan is dust and debris.
- Clean Surfaces: Never place your controller on dusty desks, carpets, or near pets. Dust, hair, and fine particulate matter settle around the stick base and are quickly pulled into the mechanism, leading directly to stick drift and internal wear.
- Protection: Use a sealed case or simply place the controller back in its original box when not in use.
B. Routine Controller Testing
Make the diagnostic check a habit. Once a month, run a game tester pad diagnostic, even if you don’t suspect any issues. Early detection of minor stick drift allows you to perform low-effort fixes (like compressed air cleaning) before the electronic wear becomes permanent controller failure. This proactive test game controller approach ensures your gear never fails you when it matters most.